
The Blanding project was a HUGE project! It wore us out so much that I swear our arms needed to be amputated!!! The original paint color was what I call DIRT with a hint of yellow/off-white! We first primed three bedrooms, a living room and a kitchen, including the kitchen cabinets, and 5 built-in cabinets through out the house, then we painted the walls with an off-white paint, which really looked WHITE to me. Not only did we paint we had a tiling project in the bathroom!!! 33 hours in 2 1/2 days was CRAZY! But we did it, we have to go down one more time to do some finish up work....but the pay was awesome!! Was it worth it? You guess that one! I did have to keep myself on Ibuprofen the whole time!
Before
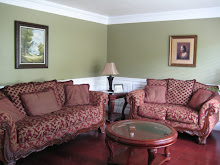
 After
After
Before

After

Here you can tell more of a difference in paint
 Look how dirty the walls are!

Here you can tell more of a difference in paint
 Look how dirty the walls are!
 Dave's tiling project (I wasn't there for the Before picture!)
 This is what the tile look like Before they ripped it out, mostly the pink tile!
After


 Say goodbye to pink and blue wallpaper!